EBay really does have everything. ALL 34 Attacktix Prototypes from Series 1 are now for Sale/Auction on eBay... From Hong Kong of course.
Crazy - $40.00 each at least.
Attacktix Prototypes on eBay
AND, for only $20.00 you can start the bidding on ALL 5 Tournament Trophy figures!
Attacktix Tournament Trophies on eBay
Wednesday, August 31, 2005
Attacktix Rule FAQ
We are now maintaining an FAQ on the Attacktix Forum. Keep this link bookmarked so that you will always have the most up to date info from Hasbro. Attacktix players have been writing into Hasbro support since week one, and this compilation will help keep track of the rules and clarification. Below are some of the more recent replies from Hasbro.
Q: Do I need to grind my figure before I use my Recover Special Ability?
A: Yes, you must regrind your figure before he comes back into play. [HASBRO]
Q: Are there any Tournament Rules yet?
A: Hasbro has not yet released any official rules, but here are some detailed guidelines if you would like to run your own Tournament. Unofficial tournament rules
Q: Can I attack/possess my own team?
A: Yes, you can attack/possess and defeat your own teammates. [HASBRO]
Q: Can I glue my Yoda's other hand on to his lightsaber?
A: Yes, you may glue Yoda's other hand to the lightsaber. Add glue neatly and carefully and he will still be Tournament legal. [HASBRO]
Q: What if my figure breaks during Tournament play?
A: You are allowed five minutes during Tournament play to fix your figure. Crazy glue and epoxy will be allowed. [HASBRO]
Q: My new Grievous Bodyguard feels stiffer than my older one, why is this?
A: Hasbro has revised two figures from Series 1: Grievous Bodyguard and Yoda. The Bodyguard was made with a stronger grade of plastic, and Yoda now comes with his right hand glued to his lightsaber.
Q: Will I be able to buy Series 1 Attacktix after Series 2 is released?
A: No, Series 1 will be retired with the release of Series 2. You may see some repainted figures, or variations of old figures, but Series 1 Boosters will no longer be available on shelves.
Tuesday, August 30, 2005
Web of Webhead - Droid Army Faction
Web of Webhead Episode 1: A Well-oiled Machine
Howdy, and welcome to Web of webhead. First, a brief introduction. My name is Brett Seymour and I go by the handle of webhead817 on most web forums. Some of you may know me from my HeroClix days...I was a moderator, and then admin, for the HCRealms fan site for a number of years. Now that I collect Attacktix, I've found Attacktix Tactics and the accompanying fourm to be a great place to hang out and talk 'Tix. I asked Joe if I could write for the site, he said, "yes," and here I am.
So let's talk 'Tix. The topic of the day is the Droid Army faction. Even though I'm a big fan of the Clone Troopers, the internal synergy of the Droid Army figures really appeals to me, so today I'm going to talk about what makes the Droid Army tick. I'll briefly review the Droid Army figures, discuss the synergy in the Special Powers, present a standard squad list, discuss some in-game tactics, and even speculate wildly on what Series 2 will really bring to the team. (I'll be reviewing information that is publicly known about Series 2, but if you've been trying to avoid any spoilers, feel free to skip the last section.)
Figure Overviews
The lowest rung on the Droid Army ladder is occupied by the standard Battle Droid figures. These 10 pt. Troopers are slow and shoot small missiles, much like any other 10-point Trooper, but have a fantastic Special Power. Much like the legendary Hydra Monster, if you cut off one head, two can grow to take its place. Unfortunately, that special triggers less than 1 in 10 times, so you can't count on it. However, it does give you something useful to do with your reserves space in a Droid Army squad.
Moving up in prestige, if not in points, are the Grievous Guards. Also 10 pt. Troopers, the Guards are the only Strikers of the Droid Army. However, they are generally regarded as the weakest Strikers by far, and their Special Power is narrow compared to other droids, though it should fire off a little more than a third of the time. Their strength right now lies outside of the Droid Army, as 10 speed Troopers, they make excellent support pieces for armored Darth Vader and starter Obi-Wan Kenobi, who can take advantage of their quicker positioning with their Special Powers.
Super Battle Droids clock in at 20 pts., twice the cost of their non-Super brethren. For the extra cost you get a bigger base, more Speed, and about a 1 in 4 chance of giving any Droid Army figure a free move AND attack on the Special Power. While this power fires off less often than the Guards, it's much more flexible as it works with any Droid Army fig, making the Super Battle Droids the cornerstone of any large Droid Army squad.
This brings us to the leader of the Droid Army, the grand General Grievous. Weighing in at 30 points with 6 speed, the General has the biggest missile IN THE GAME. Bigger than the Gunship, bigger than the missile turret from the case, bigger than any other missile out there. Grievous' Special also makes him dangerous in defeat...a full 50/50 chance he'll give 2 members of his army free moves and attacks... essentially a free turn. Many consider Grievous to be the best Launcher in the game, who am I to dispute it? Ironically, the General is Captain class. Keep in mind that he could be called out by a misfiring Anakin Skywalker Special Power. For the sake of completeness, I’m compelled to bring up the all silver T3 version of General Grievous that’s supposedly available as a tournament prize. I have a hard time believing this figure exists outside of a Hasbro display case, but I’m sure sooner or later he’ll be out there. This version is identical to the regular version, except for the paint job. Oh, and the fact that he costs 10 POINTS LESS! If you have this 20-point monster, please play him… Grievous would be worth playing if he cost 40 points, costing 20 is a steal.
Special Power Synergy
The Droid Army faction is unique in Attacktix in that all of the figures Special Powers key off of other Droid Army figures. While some Jedi rely on Specialists, some Sith rely on Troopers, some Wookiees can benefit any Warrior, Republic figs can support Jedi, and Separatists rely on Sith, only the Droid Army is self-sufficient when it comes to Special Powers.
The effect of this is that it encourages players to build squads that only contain Droid Army figures. An important point is that it encourages it, but does not dictate it. After all, non-Droid Army figures refer to Attacktix class, like Trooper, so some figures will find good homes in mixed faction decks. My point is that a dedicated Droid Army squad will have built in benefits, almost regardless of its makeup. This is a sign of good game design. The game rewards you for playing “theme teams” without dictating what those teams should be explicitly.
Building a Standard Droid Army Squad
Now that we’ve covered the figures and the strength of their interactions, it’s time to design a squad that highlights those points. We’re going to build to what appears to be the tournament standard, 100-point squad, 50 points of backups, and no Megas. I’m also going to make a couple of assumptions. One is that we want to stay somewhat in theme, which for me means no duplicates of unique characters. Two is that no one actually has the T3 Grievous, so we won’t count him.
Speaking of Grievous, any good Droid Army squad needs Grievous as a leader, so he’s in. That leaves 70 points to divvy up for the rest of the squad. I’m not particularly fond of the Grievous Bodyguards, they support the General, but no one else… I’d much rather have the Super Battle Droids kick in for any figure on the team. I also want to run some regular Battle Droids so I can stock my reserves with them as well, just in case we can catch a break and actually have their special go off in a game. To include both, we could go anywhere from three Super Battle Droids and one Battle Droid to one Super Battle Droid and five Battle Droids. Personally, I’m happy with a number somewhere in the middle, two Super Battle Droids and three Battle Droids. For reserves, I’d go with five more Battle Droids, because hey, you never know. Here’s the squad in list form:
“Rage Against the Machine”, Droid Army, 100 pts.
- 1 x General Grievous (30 pts.)
- 2 x Super Battle Droid (40 pts.)
- 3 x Battle Droid (30 pts.)
Reserves, 50 pts. - 5 x Battle Droid (50 pts.)
Here are a few thoughts about playing the Droid Army Squad above, or one similar to it. First off, you’ve got all Launchers, no Strikers, so that fact alone will dictate the way you play the game out more than anything. If you’re facing another squad of all Launchers, it’s all about aim, and making sure you present your force in a way that assures that you’ll be able to take advantage of any Specials that come up. Generally, you’ll want to lead with your Super Battle Droids, followed closely by your normal Battle Droids. Leave Grievous back and protected at first, he’s your ace in the hole. He should be poised to strike if one of your Super Battle Droids falls and uses it’s special.
If you’re facing a mixed squad, or a squad primarily made of Strikers, hang back and see how your opponent develops his position. If they lead with Strikers, you should be able to pick one of before they can close. Don’t be afraid to retreat on the move, a strong feint would be to advance your figs for a round, then retreat and fire back the next.
Plo Koon deserves special attention if he’s on the other side of the table, as his Special is deadly to the Droids if it hits. Always assume that when you take out Plo Koon, you’ll automatically lose your best figure (Grievous if he’s still standing), and plan accordingly. That way if his Special doesn’t fire, you have a pleasant surprise instead of a rude awakening.
Finally, here’s the “Hail Mary” play for the squad. The circumstances for this to occur in game seem low, but it’s worth noting you could do it if it seemed worth the risk. Let’s say you’ve lost two Battle Droids, and failed to Recruit any replacements. Your opponent is playing higher priced figs, and only has three standing to your four, but he can seriously hurt you next turn all the same. Move your third Battle Droid close to Grievous, but don’t block his line of fire. Use your first attack with Grievous (ideally taking out one of the opponent’s figures), then with your second attack use the Battle Droid to take out your own Grievous. You’ll have a fifty/fifty chance of getting two more moves and attacks for your Super Battle Droids, allowing them to close and possibly finish off your opponent. Risky, but it sure would let you win with some panache!
Series 2, which is right around the corner, looks to double the ranks of the Droid Army, with an additional four figures. First and foremost is a new General Grievous, sure to be a Super Rare, yet again. The new Grievous isn’t just a Striker, he’s a DOUBLE Striker like Darth Maul. Early reports are placing him at only 20 points, with a possible speed of 12, which is phenomenal if true. Finally, the Grievous Bodyguards will have a purpose in the Droid Army. Of course, there are new Grievous Bodyguards coming again in Series 2… still looking to be 10 points, but now with a 12 speed to possibly match up with the General. Hopefully they will have weaker or more infrequent special to maintain a sort of power level parity.
The Battle Droids will gain a Battle Droid Commander figure in Series 2, it will be interesting to see what special makes a Battle Droid worth 30 points. I’m guessing we might see another double Attackback or Shootback, but only for Battle Droids perhaps. Mostly, I hope that the Droid Army maintains it’s focus with keeping all Special Powers that interrelate to other Droid Army figures.
Finally, one of the most exciting and unique figures in Series 2 looks to be the Destroyer Droid, having two small missile attacks. If the AT-RT is any indication, you will be able to reposition the second arm after firing the first, a very tactical addition to the game. At 40 points, the Destroyer is more than half the price of an AT-RT, which means that its missiles to cost ratio is higher. (i.e., To get the four missile attacks the AT-RT gives you, you’d need two Destroyer Droids, which would cost you 80 points vs. the AT-RT’s 70.) However, having two units that can fire twice means you can use more flanking maneuvers, plus benefit from Droid Army effects (hello Super Battle Droid!) Also, as of right now, Megas don’t appear to be tourney legal, so the comparison ends up being moot for the moment. All in all, the Droid Army looks to get better in Series 2, with a new Striker Grievous likely to increase the viability of a mixed Striker/Launcher Droid Army.
Well, that’s all for today. I hope you enjoyed this review of the Droid Army. Hopefully next time we’ll be talking about the coolness that is Series 2, but if not…there are always Wookiees.
– webhead817
![[image]](http://i23.photobucket.com/albums/b365/malform/attacktixchart-finaldroid.jpg)
![[image]](http://i23.photobucket.com/albums/b365/malform/attacktixchart-finalsith.jpg)
![[image]](http://i23.photobucket.com/albums/b365/malform/attacktixchart-finalseparatist.jpg)
![[image]](http://i23.photobucket.com/albums/b365/malform/attacktixchart-finalwookiee.jpg)
![[image]](http://i23.photobucket.com/albums/b365/malform/attacktixchart-finalrepublic.jpg)
![[image]](http://i23.photobucket.com/albums/b365/malform/attacktixchart-finaljedi.jpg)
Tuesday, August 23, 2005
Attacktix Commercial Airing Now
This Attacktix Commercial has been aired for over three months now. It has been sighted on WB, Cartoon Network, Nickelodeon and more, during children's cartoons.
This 15 second gem is reminiscent of the old G.I. Joe and Original Star Wars commercials of the early 80s. Which makes sense, 'cause it's still Hasbro!
Take a look here: Attacktix Commercial
NEW: This one is NOT taped off my TV :)
I filmed this off the TV so the video quality is washed out, and the sound is a little "spacey". But if you don't have the time to commercial hunt, like my wife, then this will have to do!
Thanks to Sapph for watching hours of cartoons.
Monday, August 22, 2005
Attacktix Republic Gunships Hit Targets Nationwide
If you are looking for a gunship, head to your local Target. While no Series 2 Boosters or Starters have been spotted, the sole Series 2 Battle Masters are popping up on Target shelves in:
![[image]](http://img339.imageshack.us/img339/5575/picture0011zw.th.jpg)
![[image]](http://img339.imageshack.us/img339/3179/picture0025hy.th.jpg)
Click here to see the gunship instructions
And check out the forum to learn more about Series 2 Droids and tons of Gunship Pics!
Clearwater, FloridaHere is a sneak peek at the insert:
Los Angeles, California
Grand Rapids, Michigan thanks ignatosr
Target Greatland Store(s) Minnesota (won't be on shelves for a few weeks) thanks spartan117
Dallas, Texas thanks erp3
Danbury, Connecticut thanks JediX
Birmingham, Alabama thanks nubjubjr
Mesa, Arizona thanks Rebelscum forum member MagusVader
Algonquin, Illinois thanks grobo
![[image]](http://img339.imageshack.us/my.php?image=picture0011zw.jpg)
![[image]](http://img339.imageshack.us/my.php?image=picture0025hy.jpg)
Click here to see the gunship instructions
And check out the forum to learn more about Series 2 Droids and tons of Gunship Pics!
Sunday, August 21, 2005
Attacktix Series 1 Revision 1
Malform, on the Attacktix Forum, has brought to our attention that newer Booster Boxes of Attacktix now contain revised figures. Yoda now comes with his other hand glued to his lightsaber. I have always noticed that his saber hand would always bend a little too much for my liking, and if the saber would stay in his free hand, it would put my mind at ease. He has been known to break after all. I contemplated adding some clear rubber bands, but with this new release, it looks like it is now tournament legal to have his hands glued to the saber.
Malform also noticed a difference in the grade of plastic used on his Grievous Bodyguards. They are now made from a more rigid, stiffer plastic. I bought a new Booster Box myself, and was pleased to find the Bodyguard IS a much tougher figure, not so "weak in the knees", so to speak.
I also noticed the on my revised Grievous Bodyguard his Electrostaff is now facing the other way. The staff has a skinny portion, for the hands to grasp, and a fatter portion, to keep the hands from slipping out of place. My three previous Bodyguards all had the length of the staff to their right. My newer, more rigid Bodyguard has the lengthier end of his staff on his left.
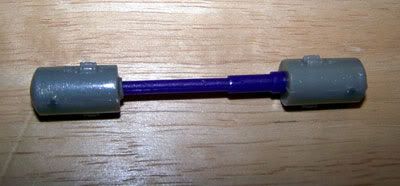
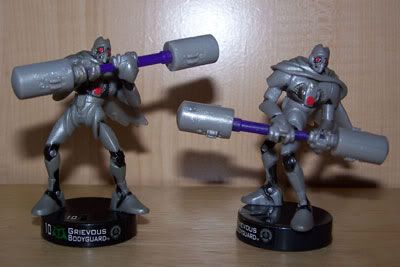
I do not know if this is a mistake, or also a planned part of the revision. Anyone that can compare a new and old figure, please let me know.
Malform also noticed a difference in the grade of plastic used on his Grievous Bodyguards. They are now made from a more rigid, stiffer plastic. I bought a new Booster Box myself, and was pleased to find the Bodyguard IS a much tougher figure, not so "weak in the knees", so to speak.
I also noticed the on my revised Grievous Bodyguard his Electrostaff is now facing the other way. The staff has a skinny portion, for the hands to grasp, and a fatter portion, to keep the hands from slipping out of place. My three previous Bodyguards all had the length of the staff to their right. My newer, more rigid Bodyguard has the lengthier end of his staff on his left.
I do not know if this is a mistake, or also a planned part of the revision. Anyone that can compare a new and old figure, please let me know.
Attacktix Republic Gunship on eBay
The Republic Gunship has turned up early on eBay. No word how, but if it's legit it's a great way to get some practice before these are officially released.
Attacktix Gunship on eBay
PostScript: If you buy it, tell me all about it! PLEASE!
EDIT: Jaypee has let me know that www.galactichunter.com has announced the Gunships are available in Targets in L.A.
Attacktix Gunship on eBay
PostScript: If you buy it, tell me all about it! PLEASE!
EDIT: Jaypee has let me know that www.galactichunter.com has announced the Gunships are available in Targets in L.A.
Attacktix Republic Gunship OUT
8/21/2005 3:37:36 PM | Reported by Adam
It's out! We sighted several of the new Attacktix Republic Gunship at a Los Angeles area Target store mixed amidst a pile of Darth Vader, Stormtrooper, Princess Leia, and Han Solo figure-with-cup sets. There's a lot of new stuff hitting stores including more shipments of Evolution, Battle Packs, and more, so happy hunting!
Saturday, August 20, 2005
More Logan Lubera Sketches
If you remember the earlier post about Attacktix Box Art Artist, Logan Lubera, then you may appreciate these next two sketches. For some reason, they are being sold on eBay. I hope he is going to some more conventions this year. If anyone has any information as to if Logan has his own webpage, please let me know!
Thursday, August 18, 2005
General Grievous #28 Tips and Tricks
General Grievous #28
Guest Reviewer: Jason
ATTACKTIX CLASS: Captain
STAR WARS CLASS: Droid Army
POINT VALUE: 30
SPEED: 6
SPECIAL POWER: Attackback (2 X Droid Army)
SPECIAL POWER RATIO: 13/26 (50%)
ATTACK TYPE: Shooter (Heavy Missile)
General Grievous is easily the most powerful shooter in Series 1, and this reviewer could argue he is the best figure overall. There are several good s\Strikers, but the gap between the #1 and #2 Shooter is enormous. In addition to his large projectile, he also rings up his special power 50% of the time. While losing Grievous is tough to swallow, two extra attacks for your Droid Army helps ease the pain.
Tips for attacking with General Grievous:
If he has a clear shot, General Grievous can take out almost anyone from almost any distance. You should practice with him so that you can fire accurately. On smaller figures, even a glancing blow will bring them down.
Because he is so good, he starts every game with a big target painted on his chest. Be sure to protect him with other figures - Grievous Bodyguards are ideal. Place one or two of them (side by side) in front of Grievous and he can still fire over their electrostaffs.
When firing with General Grievous, have him face to his left. This will give him a smaller profile and make him more difficult to hit.
General Grievous should take out at least one figure every time he attacks. He is that good.
Make sure you team him up with other Droid Army figures, as there is a 50% chance he will give two of them a free move and attack.
Beware Plo Koon! Plo's special power allows him to remove one of the enemy's Droid Army figures, and it comes up 54% of the time. If you are fighting against Plo Koon, try and take him out late, when victory is close at hand.
Tips for attacking General Grievous:
Whenever you have a chance to knock down General Grievous, take it. He is too much of a threat to leave on the table. He is a good figure to target if you get to go first and he is standing on the starting line unprotected.
Grievous doesn't provide a great target, but his chest or gun are your best bets.
Alternative Strategies
If you have Plo Koon, use him. General Grievous breaks into a sweat whenever he sees him on the other side of the battlefield. You may even try to leave Plo Koon fairly unprotected to see if you can bait your enemy into attacking him. It's a devastating blow to have your enemy reach over and take General Grievous off the table.
Wednesday, August 17, 2005
Attacktix Scavenger Hunt in Final Days
Just a reminder to anyone participating in the Attacktix Scavenger Hunt all collections must be postmarked by August 19th! Mailing instructions are listed in the Attacktix Forum, or leave a comment if you have any last minute questions!
Good luck, and I can't wait to see who will take home the All-Silver Chewie!
Good luck, and I can't wait to see who will take home the All-Silver Chewie!
Tuesday, August 16, 2005
Attacktix Rule Clarification: AT-RT
The AT-RT is a very powerful figure. So powerful that its proper use was questioned. Originally, Hasbro stated that no figures could be moved after you have begun your attack. However, more clarification was required as to if "moving" meant adjusting the AT-RT head.
Hasbro has officially released these rules on the AT-RT:
A digital copy of the AT-RT instructions can be found here.
Hasbro has officially released these rules on the AT-RT:
The AT-RT can attack 4 different times (1 for each missile) against one or multiple opponents. The head can be moved between each shot.So that, combined with the printed rules, should fully define the proper use for the AT-RT.
A digital copy of the AT-RT instructions can be found here.
Sunday, August 14, 2005
Attacktix Promotional Cards in National Geographic for Kids
These promotional cards are available in the September issue of National Geographic Magazine for Kids! I haven't seen the magazine on shelves yet, but it has shipped to subscribers. This insert features Luke Skywalker, Obi-Wan Kenobi, Darth Maul, Boba Fett and Darth Vader. The back of the card lists their stats, powers and abilities, along with a brief description of the figure. The cards are also numbered, matching the figures' Series 2 numbering. No word if a complete set will be available. Is it possible that cards will be matched and available with each figure? Or will there be one, to three, cards randomly inserted in each booster pack? Or are these five perforated cards, and checklist, all we will see of these things. I guess we will know in a few weeks!
Click on the images to see the full detail.


Images from Rebelscum.com
Click on the images to see the full detail.


Images from Rebelscum.com
Saturday, August 13, 2005
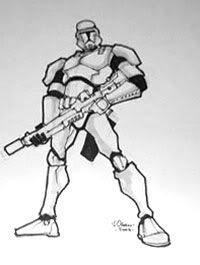
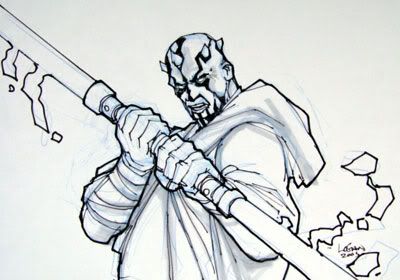
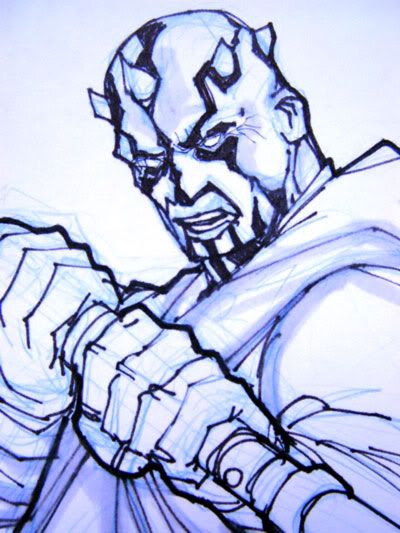
Attacktix Artist/Designer Logan L. Lubera Sketch
This is a sketch by Logan L. Lubera, artist and designer for Hasbro's Attacktix. LOGAN LUBERA is from Ontario, Canada. 1990 saw him set for a sporting life, drafted to play Pro Football. Subverted into the world of drawing by a three-week sojourn at the Games Workshop design studio, all thoughts of football flew south. Since then, Logan has drawn for Image Comics, is now setting up his own studio, Bright Anvil Studios, and is soon to publish his own comic books. "The biggest thing to remember is you can never stop learning!"
He was providing free sketches at the SDCC. This sketch belongs to "Darth Tater"

Here are some more links to Lubera's work:
http://universomarvel.com/bajolamascara/noticias/23_09_04/mage.jpg
And an interview about his upcoming Dark Horse Comic, Outlaw 7.
He was providing free sketches at the SDCC. This sketch belongs to "Darth Tater"
Here are some more links to Lubera's work:
http://universomarvel.com/bajolamascara/noticias/23_09_04/mage.jpg
And an interview about his upcoming Dark Horse Comic, Outlaw 7.
Friday, August 12, 2005
Grievous Bodyguard #13 Tips and Tricks
Grievous Bodyguard #13
Guest Reviewer: Jason
ATTACKTIX CLASS: Trooper
STAR WARS CLASS: Droid Army
POINT VALUE: 10
SPEED: 10
SPECIAL POWER: Attackback (General Grievous)
SPECIAL POWER RATIO: 10/26 (38%)
ATTACK TYPE: Striker (Electrostaff)
The Grievous Bodyguard has a lot going for him. He is the only 10 point striker available in Series 1. He has 10 speed, which allows him to cover a lot of ground. And his special power has a 38% chance of occurring - 30% more than any other 10 point figure. And that may be his greatest strength - a legitimate shot at more attacks for your General Grievous. Finally, he is a trooper, allowing him to him keep Armored Vader, Starter Vader, or Starter Obi-Wan around.
Tips for attacking with Grievous Bodyguard:
The first thing you have to decide is whether to send the Bodyguards out with your strikers or leave him back with your General Grievous. If Grievous isn't on your team, you had better send him out with your strikers.
If you decide to keep your Bodyguards with Grievous, place them in front of him. He will still be able to shoot around their electrostaffs and if they go down, there's a fair chance it will provide Grievous with another attack.
Since the Bodyguard has 10 speed, he is a great candidate to back up your strikers. He can provide a little extra defensive support, and he is still a figure that must be reckoned with. He may also draw fire away from some of your more important figures. His special power is always a possibility, so having him close to the enemy is not a bad thing.
The Bodyguard can be a tricky figure to attack with. Since his striking surface isn't very big, you have to make sure you pick a good spot to attack your enemy. An extended weapon, arm, or on the head is a good choice.
The key to using the Bodyguard is to twist the base with your left hand, while holding the tip of his electrostaff with your right pointer finger and keeping your right thumb on his back, in between his shoulders. This will keep him from bending back when you twist him. Once he is ready to strike, be sure his electrostaff is touching the figure you want to attack (you may need to raise his arms for a higher hit). This will ensure the maximum amount of force, and with this guy you're going to need it. Using this technique, you can take down any non-Mega figure.
Tips for attacking Grievous Bodyguard:
Being a 10 point Trooper, the Bodyguard is pretty easy to take down. Your main concern is his special power. Before you take this guy out, make sure Grievous isn't in position to hurt you.
Alternative Strategies
Having this figure follow Starter Vader or Starter Obi-Wan will allow them to use their Sacrifice ability closer to enemy lines, rather than way back where your slower Troopers are.
Suggested striking method:
Sunday, August 07, 2005
Attacktix Unofficial Survey
Please take a moment to answer this survey. It has a few questions about the Attacktix line and related issues. If you are NOT a member of the Attacktix Forum, be sure to include a valid e-mail address as prizes may be awarded.
Prizes will be awarded at RANDOM and not at all based upon your answers.
TAKE THE SURVEY NOW
Prizes will be awarded at RANDOM and not at all based upon your answers.
TAKE THE SURVEY NOW
Friday, August 05, 2005
Super Battle Droid #2 Tips and Tricks
Super Battle Droid #2
Guest Reviewer: Jason
ATTACKTIX CLASS: Trooper
STAR WARS CLASS: Droid Army
POINT VALUE: 20
SPEED: 6
SPECIAL POWER: Attackback (Droid Army)
SPECIAL POWER RATIO: 6/26 (23%)
ATTACK TYPE: Shooter (Small Missile)
The only thing the Super Battle Droid has in common with the regular Battle Droid is his name. In all other ways, he is vastly superior. First of all, he has a much larger base, allowing for better defense. In fact, only Mace Windu and a handful of 40 point figures have a larger base than the SBD. In addition to that, his head is part of his chest, making him a hard target to hit. In short, he is the best 20 point launcher in Series 1, in this reviewer's opinion.
Tips for attacking with Super Battle Droid:
The SBD is a tough little guy to bring down. Since his head is a part of his chest, he is shorter than a normal figure. He is also very smooth, allowing a lot of shots to glance off of his body.
Another key for the SBD is that his gun is on his left hand. This gives him some unique opportunities to shoot around other figures. You can place him next to a right-handed launcher, and then let them both hide behind a stronger figure, still allowing them both to shoot.
Because of these defensive abilities, the SBD is a good choice for a front line shooter. But since he has a small projectile, he will require some accurate shooting.
When firing with the SBD, be sure to stabilize his base with your non-shooting hand and aim for any extended body parts.
Tips for attacking Super Battle Droid:
Because of his previously mentioned strengths, the SBD can be a challenging opponent. Be sure not to aim too high, as shots can easily go over his head or just ricochet off of it.
His chest is the best target, and from close range it is a guaranteed take down.
From long range, a small projectile is able to bring him down, but it has to be a direct hit. His gun is a good target as well, and a direct hit there will nearly always finish him off.
Alternative Strategies
The SBD is also good for defense. His large base can backup your figures, and his gun can rest against their backs, providing a great defensive boost.
Make sure he is teamed up with other Droid Army figures. Even though his special power is rare, it still has a legitimate possibility of happening. This means a free move and attack for any of your other Droid Army figures, including General Grievous. And any free attacks for Grievous are deadly to your opponent.
Wednesday, August 03, 2005
Attacktix 103 Team Formations
Guest Reviewer: Stephen

In this tutorial, I hope to show case some easy to assemble formations that will give you a number of strategic options for grouping your figures in attack or defensive formations. There are two major principles involved in creating formations, both of which are designed to increase the resistance of the whole formation to damage: stacking of bases and interleaving of weapons. The formations below all involve only 2 lines of figures so as to minimize the number of figures needed to accomplish any particular formation. Ideally, in each formation, any gaps that exist between figures will go straight through the entire formation, thereby not leaving any exposed areas for a well-placed (or lucky) missile to hit.
There are two main ways of stacking figures in any formation: tight and loose. In tight formations, figures' bases are placed adjacent to each other. In loose formations, figures' bases are placed approximately 1 10-point figure's base diameter apart. Tight formations are ideal for combating shooter armies, whereas loose formations help minimize the damage that a striker group can inflict on your figures. All formations are pictured in their “tight” variant, so if you're facing a bunch of strikers, you'll need to spread them out. Beware that loose formations will take the formation's stability rating down a notch or two.
Each formation is ranked on a few different factors that may affect your decision to use it. In testing each of these formations, I have used 10- and 20-point figures. If larger figures are used, the stability of the formation will go up. Roughly speaking, for every 10 point increase in the overall point value of the figures involved in the formation, the stability rating will go up by one point.
Protected figures The figures that are afforded the greatest protection by the formation
Vulnerable figures The figures to aim for, if your opponent is stacked in this formation
Offensive or defensive The degree to which the formation still allows for most figures to be engaged in offensive attacks vs. sacrificing their attacking power for increased defensive stability. Formations can be offensive, defensive, or mixed.
Speed Generally, any formations involving shooters are going to be slow to medium, and those involving only strikers will be fast.
Ease of movement The degree to which a formation can be moved without requiring substantial rebuilding
0 All figures must be disassembled and reassembled to move the formation
1 Within each line,
2 Each line of the formation may move easily
3 The entire formation may be moved all together
Stability The degree to which the formation affords protection to its weakest figure
0 At least one figure may fall to a point-blank small missile
1 At least one figure may fall to a point-blank large missile
2 At least one figure may fall to a point-blank Force blast
3 Can withstand a point-blank Force blast to any figure but will dislodge at least one figure from the formation substantially
4 Can withstand a point-blank Force blast to any figure without moving any figures appreciably.
Basic triplet

In this formation, the heaviest figure is placed in front to absorb blasts that would be directed toward the lighter two figures in the rear. The base of the front figure is placed in front of and between the bases of the two figures in back. All weapons are pointed forward. Tested with 1 Clone Lieutenant in front and 2 Clone Troopers in back.
Protected figures Figure in front
Vulnerable figures Unless they're covered by the weapon of the figure in front, either of the figures in the rear
Offensive or defensive Offensive
Speed Slow
Ease of movement 3
Stability 0
Triple cross

This is a modification of the basic triplet, in which the two figures in the back cross their weapons to provide additional stability to the formation. This takes away two offensive guns from the back row. Tested with 1 Clone Lieutenant in front and 2 Clone Troopers in back.
Protected figures Front figure
Vulnerable figures Figure farther back in the back line
Offensive or defensive Mixed
Speed Slow
Ease of movement 3
Stability 2
Backwards triplet

This is a reversal of the basic triplet or triple cross, in which a large-based figure with a long weapon is used to support two smaller front line figures. If you keep the front line figures' weapons pointed, this is a variant of the basic triplet; if their weapons are crossed, this is a variant of the triple cross. One front line figure's base is aligned with the back line figure's base, and the other front line figure's based is placed adjacent to the other front line figure's base, in front of the back line figure's gun. Tested with 2 Clone Troopers in front and 1 Clone Commander in back.
Protected figures The back figure
Vulnerable figures The front figure that's supported only by the back figure's weapon
Offensive or defensive Mixed (pointed front row weapons) / defensive (crossed front row weapons)
Speed Slow
Ease of movement 2
Stability 1 (pointed front row weapons) / 3 (crossed front row weapons)
Tripod triplet

This is a somewhat unique variant of the basic triplet, in which the tip of each figure's weapon is pointed at the ground to provide a third leg of support. Though this takes the weapons out of immediate use, it enhances the stability of the formation greatly. It also takes some relatively flexible figures (e.g., Clone Troopers) in front to accomplish this, as many figures cannot rest the tips of their weapons on the ground, no matter how you twist their waists around. Tested using 1 Clone Trooper in front and 2 Wookiee Scouts in back.
Protected figures Figure in front
Vulnerable figures Figures in back
Offensive or defensive Defensive
Speed Slow
Ease of movement 3
Stability 1
Force Shielding

Here, Force blasters use either their strong bases or raised Force blasts to protect figures in the rear. The ability of the Force blasters to stay up under heavy assault is directly proportional to the strength of the figures placed in back. Hence, you may want to put the smaller figures in front of the Force blasters if you use figures less than 30 points in this formation. Tested with Obi-Wan Kenobi and Plo Koon Force Blasters in front, 2 Clone Troopers in back.
Protected figures The figures in back
Vulnerable figures The Force blasters in front, particularly if they have a weak supporting cast in the back
Offensive or defensive Mixed
Speed Slow
Ease of movement 3
Stability 2/3
The 2x3

This formation is a method of making a relatively solid attacking line of low-point troopers. As pictured, it is a purely defensive line. However, you can point the front line troops' weapons toward the enemy with little to no loss of stopping power.
[u]Protected figures[/u] The figures with the most weapons overlapping (in this picture, those on the left and middle, front and back)
Vulnerable figures The figures with the fewest weapons overlapping them (in this picture, those on the right side, front and back)
Offensive or defensive Mixed/Defensive
Speed Slow
Ease of movement 2
Stability 1 (vulnerable figures) / 3 (protected figures)
Wookiee Olympics

In this formation, the Clone Troopers in the front and the Wookiees in the back together look somewhat like the Olympic Rings. Chewbacca and Tarrful have their paws resting behind the left and right side front line figures to catch them. These figures also block shots from taking down either Wookiee by the paw. However, the middle figure in the front line still doesn't have that much support (and falls in the crease between the two Wookiee bases), even if the front line figures are rotated into a defensive line. Tested with Tarfful and Chewbacca in the back line, and 3 Clone Troopers in the front line.
Protected figures Back line Wookiees and side front line figures
Vulnerable figures Middle front line figure
Offensive or defensive Mixed/Defensive
Speed Slow
Ease of movement 2
Stability 2
The Four Noble Truths

Here, a back line of strikers provides additional protection to a front line of Force blasters. If you leave the Force blasts down, the front line will have a bit more stability, as the Force blasts nearly form a second base for those figures. The back line strikers' striking surfaces are interleaved to provide support to each other when the front line is hit. Tested with Anakin Skywalker and Shaak Ti in the front line, and 2 Count Dookus in the back line.
Protected figures All
Vulnerable figures Front row figures with Force blasts raised
Offensive or defensive Mixed
Speed Slow
Ease of movement 2
Stability 3
The Eightfold Path

This formation is a conjunction of two 2x2 defensively arranged shooter formations. Each 2x2 group consists of lower point figures in the front and higher point figures in the back. In addition, having the two groups together allows figures in the middle (that would otherwise be on the periphery and thus spin out when hit) to catch each other. Tested with 4 Clone Troopers and 4 Super Battle Droids.
Protected figures Middle figures
Vulnerable figures Peripheral figures
Offensive or defensive Mixed/Defensive
Speed Slow
Ease of movement 1
Stability 3
Wall of sabers

The interleaving of sabers between figures makes this a nearly ideal formation for the defense of a 2x2 group of strikers. As long as the strikers aren't attacked from either side of this formation, each striker is protected by 3 other striking surfaces (1 in front, and 2 in the all-important back), along with another striker's base. Tested with 4 Count Dookus.
Protected figures All
Vulnerable figures None
Offensive or defensive Defensive
Speed Fast
Ease of movement 2
Stability 3
Jedi cross

By crossing sabers in the midpoint of this formation, each striker derives additional strength from its compatriots. However, this method of defense leaves all figures' front and back sides unprotected from your opponent's fire, thus making this a less than ideal defensive formation. Tested with 4 Count Dookus.
Protected figures All
Vulnerable figures All
Offensive or defensive Defensive
Speed Fast
Ease of movement 0
Stability 2
Saber box

This formation is essentially a weaker version of the wall of sabers, inasmuch as each striker is now protected only by 1 striking surface (only in the front, which does little to arrest a backward-falling striker's momentum) and 1 additional figure base. It may be good to use only when an opponent is attacking from all sides, thus making it unclear which side to defend. Tested with 4 Count Dookus.
Protected figures Figures on the side and back
Vulnerable figures Figure in front
Offensive or defensive Defensive
Speed Fast
Ease of movement 2
Stability 1
Tuesday, August 02, 2005
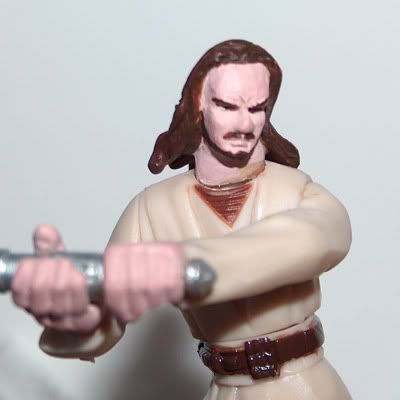
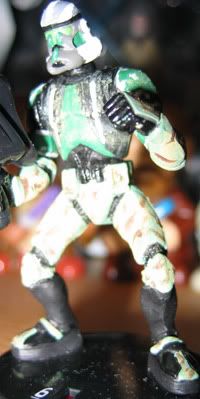
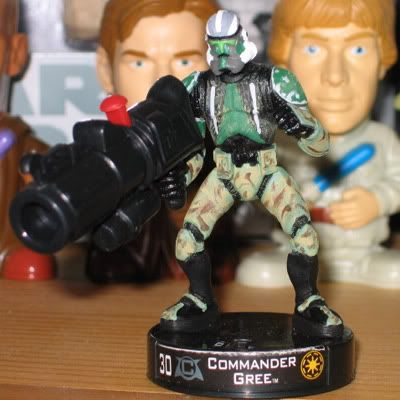
Custom Attacktix - Qui-Gon Jinn & Commander Gree
Without getting into any arguements over the differences between custom and repaints, I would like to present a few customized figures. If you have any customizations you would like to share with this board post a link to your image in the comment section and I will be sure to add it to the site!
warlordofmars (Winner of Attacktix Contest II)
Qui-Gon Jinn

punisherad
Commander Gree
warlordofmars (Winner of Attacktix Contest II)
Qui-Gon Jinn
punisherad
Commander Gree
Countdown to Star Wars Attacktix Series 2
Thanks to SFX
ONE MONTH (or less) 'TILL SERIES 2!
That's right kids, just a few more weeks untill we see the release of the much anticipated Series 2. Here's some great Series 2 info:
JayDouble's Comic Con Pics
Sirsteve's Comic Con Pics
Rebelscum's Comic Con Pics
Cereal's Comic Con Teaser
Cereal's Comic Con Updates
Attacktix Tactics Republic Gunship & Attacktix Future
Attacktix Tactics Republic Gunship First Look
Complete Figure Guide
In addition to collecting all we know about Series 2 I hope others will use this thread to post any information they may come across. Including:
- where and when they spot Series 2 for sale (traditional stores/online stores)
- prices/sales/deals
- booster pulls
- first impressions
- gameplay
- how does Series 2 compare/mix with Series 1
- etc.
What can we expect from Series 2?
Series 2 will consist of 30 figures sold in 3 figure boosters with a suggested retail price of $6.99. Of these 30 figures 25 will be new figures with new sculpts and 5 will be repaints with new names/stats, etc. Series 2 will be released late August/early September.
New figure sculpts:
01 Jedi Knight
02 Uta Pau Warrior
04 Scout Trooper
05 ARC pilot
07 Royal Guard
10 Neimoidian Captain
11 Wookiee Captain
13 Bossk
14 Princess Leia
15 Jango Fett
16 Mace Windu
17 Darth Vader
18 Obi-Wan Kenobi
19 Destroyer Droid
20 Medic Droid
21 R2-D2
22 Tion Medon
23 Chewbacca
24 General Grievous
25 Darth Sidious
26 Darth Maul
27 Kit Fisto
28 Han Solo
29 Luke Skywalker
30 Boba Fett
Figure repaints how are they different?
03 Clone Trooper- repainted Series 1 Clone Trooper/same stats/new power- Rally/new team- Imperial.
06 Grievous Bodyguard- repainted Series 1 Grievous Bodyguard/12 movement (+2 from Series 1)/new power- Attackback.
08 Clone Commander- repainted Series 1 Commander Bly/Clone Commander/same stats/new power- Rally/new team (from Bly)- Separatist.
09 Clone Captain- repainted Series 1 Clone Lieutenant/new name/4 movement (-2 from Series 1)/new power- ?/new team- Republic.
12 Battle Droid Commander- repainted Series 1 Battle Droid/new name/20 points (+10 from Series 1)/6 movement (+2 from Series 1).
Series 2 will also see the release of a new starter consisting of 4 repainted figures with new names/stats, etc. with a suggested retail price of $9.99.
31 Mace Windu- Series 1 Mace Windu/smaller base/12 movement (+2 from Series 1)/new power- ?.
32 Anakin Skywalker- Series 1 Darth Vader/same stats/new power- ?/new team- Jedi.
33 Wookiee Warrior- repainted Series 1 Wookiee Commando/same stats/new power- ?/new team- Wookiee.
34 Clone Commander- repainted Series 1 Commander Gree/same stats/new power- ?/new team- Jedi.
New Battle Master
And, of course, Series 2 will see the release of the highly anticipated Battle Master Mega- Republic Gunship with a suggested retail price of $9.99. (see link above for details)
New Teams
Rebels
Imperials
Bounty Hunters
New Powers (that we know of)
Capture: Gain control of attacking figure for remainder of game if you have another figure in play
Rescue: Return this figure to the starting area if you have a (star wars class/attacktix class) in play
New Attack Variations
Kicking- 18 Obi-Wan Kenobi
2 Shots on a basic figure- 19 Destroyer Droid
Non-combat chance spinner (rally)- 20 Medic Droid
Non-combat chance spinner (attacks)- 21 R2-D2
Dual strikers- 24 General Grievous
Dual strikers- 26 Darth Maul
Backpack/bend-over launcher- 30 Boba Fett
On top of all this Series 2 will finially bring us the wide release (we hope) of the Battle Case with a suggested retail price of $12.99 and those Tournament Rules we've been waiting patiently for.
As you can tell, I'm very excited to see these guys hit the shelves, as I'm sure you are as well. Check back here for the latest on this release as we celebrate the biggest event (so far) in the ongoing story of our favorite game... STAR WARS ATTACKTIX!
Subscribe to:
Posts (Atom)